
Getting Started
From registration to a usable dashboard: this page explains account creation, email confirmation, company approval, and the first view you see after login.
Create an account
Register
Open app.lobhub.de/auth/register and enter your full name, email address, and a password with at least 8 characters. Accept the terms and privacy policy, then select Get Started Free. No credit card is required.
Confirm your email
After registration you receive a confirmation email from noreply@lobhub.de. Select the link in that email — the confirmation completes on a page at auth.lobhub.de (provided by our sign-in service, Google Identity Platform) and then returns you to the login page. If it does not arrive, check spam or use Resend Email on the confirmation page.
Wait for approval
LobHub reviews each newly registered company before unlocking it — this protects the platform from abuse. Until then you see the Application under review page. Once your company is approved, Refresh status (or signing in again) gives you full access.
Sign in
Use app.lobhub.de/auth/login. Sign-in is handled securely by Google Identity Platform; your password is stored exclusively as a cryptographic hash. Remember me keeps your session on this device; Forgot password? sends a reset email (sender noreply@lobhub.de, completed on the confirmation page at auth.lobhub.de).
Your trial starts immediately: 30 days free with 5 collection forms, 1,000 approved testimonials, and 3 active widgets. See Plans & Billing.
The dashboard
After login you land on the dashboard (Overview in the sidebar). It shows at a glance where you stand:
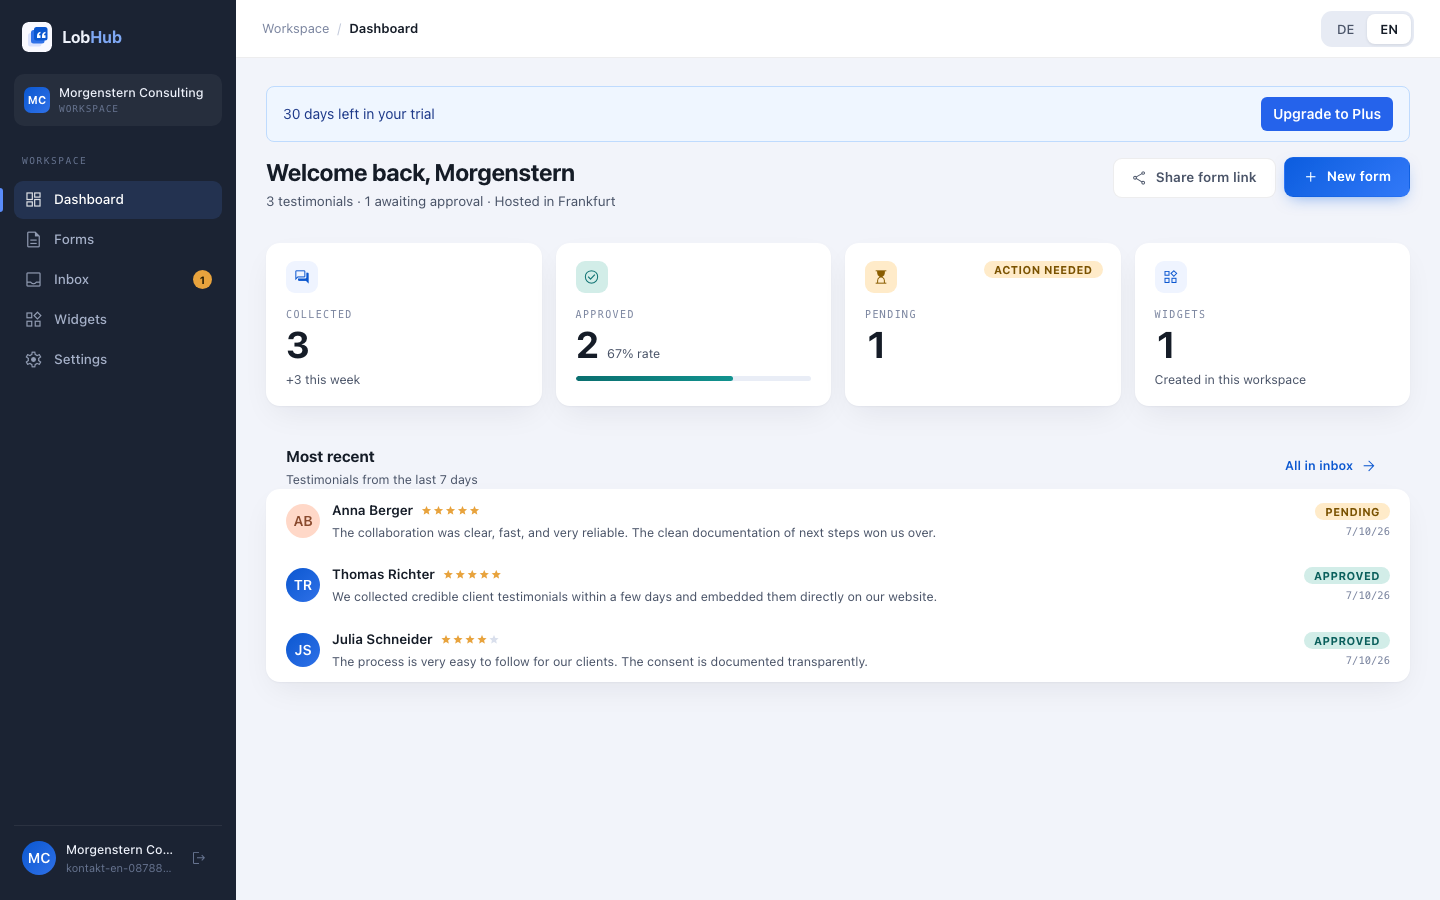
- Collected — all incoming testimonials, including weekly trend.
- Approved — testimonials already published and your approval rate.
- Pending — submissions waiting for your review (Action needed).
- Widgets — widgets created in this workspace.
Below the metrics you find Most recent — testimonials from the last 7 days with their status (Pending, Approved, or Rejected) — plus the quick actions Share form link and New form.
The onboarding checklist
When you start out, the Get started checklist walks you through the four steps to your first embedded testimonial:
- Create form — questions, branding, consent text → Forms
- Send link — to customers, colleagues, or partners → Share a form
- Approve testimonial — review and publish incoming submissions → Inbox
- Embed widget — place the embed code on your website → Widgets
Interface language
The app is fully available in German (default) and English. Your choice is saved in the browser and restored on every visit. Independently of this, you choose per collection form which language your customers see — see Forms → Branding.
Last updated: July 2026